 Creating your own sparkling Shamballa Style Bracelet is easy when you know how. Here’s a simple step by step guide for making the basic bracelet.
Ingredients :
Leather, 1mm Waxed Cotton, Nylon or cord
Crystal Pavé beads and/or beads with a 1mm size hole or more.
GS Hypo Cement Glue
Bead Mat & Pin
Clear Nail Polish
Instructions:
STEP 1: To get started cut a 40cm long length of cord, add a dab of clear nail polish to each end and allow to dry (this makes the beads much easier to thread). Now thread on a bead and tie a knot in one end of the cord. Next Slide the bead along the cord until it is approximately 10cm away from the knot and tie another knot. Pin the cord to the bead mat as shown in the picture below.

STEP 2. Next take a 1 metre length of cord (it's always better to have too much than too little!) and tie a knot onto the first cord as shown in the picture below:

STEP 3. Now you're ready to begin tying your square knots. This can be tricky at first, but don’t worry it will get easier with practice First take the thread on the left and make a loop so that it sits over the centre cord. Like this:

STEP 4. Now pass the cord on the right underneath both the other cords and up through the middle of the loop to create a knot.

STEP 5. Pull this knot tight (not too tight) as the central cord needs to be able to move through the knots easily. You've now made 1/2 a square knot!
WARNING! If you make the knot too tight there's a risk your central cord might snap when you wear the bracelet - this is especially important if you're using leather cord like us which is more brittle than cotton or nylon.
STEP 6. Now repeat the process but with the right hand cord. Make a loop with the right hand cord so that it resembles a back to front number 4 and pass the left hand cord underneath both the other cords and up through the centre of the number 4. Pull it tight and you've made your first complete square knot! Now you’re ready for the next bead...

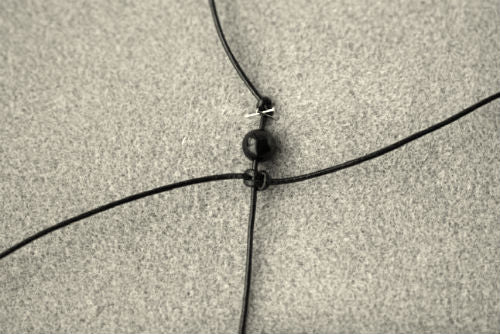
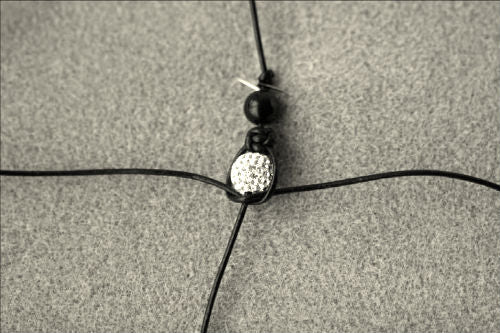
STEP 7. Next bring the outer cords around the bead and tie another square knot:

STEP 8. Continue adding beads until you've got 5-8 beads each separated by a square knot.

STEP 9. Now you're ready to finish off the outer cords. Simply tie a reef knot in the two cords, pull it tight and add a little GS Hypo Cement glue to the knot. Wait a few minutes for the glue to dry and snip off the outer cords. Thread on another bead and you're almost done:

STEP 10. Next tie another knot in the end of the central cord after the last bead and take it off the bead mat. Cross both ends of the bracelet over one another, keeping the two last beads at the ends of the cord against the knots:

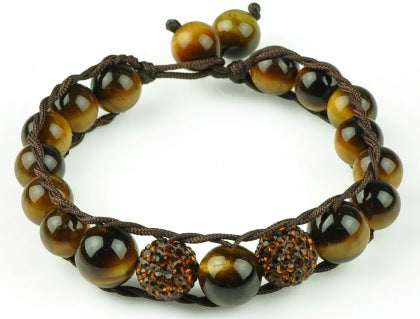
STEP 11. Finally tie 2 sliding knots using the main thread, add a bead to each end and then a knot to secure. You have now completed your Shamballa style bracelet!

Now you can start experimenting with different colours and different styles of beads. We love to use semi-precious beads such as Black Onyx and Amethyst, adding metal charms and beads for a more unique bracelet!